Learn how to extract and view your iPhone’s GPS history to create a route on an interactive map, using native methods, third-party apps, or GPX/KML/CSV file exports.
To obtain the history of GPS coordinates of your iPhone, here are several methods depending on the level of detail and the tracking frequency you are looking for:
The iPhone automatically records some of your trips under “Important places”, accessible in the settings.
If you want complete tracking, you have to use a dedicated application.
If you have activated Google Location History, it is possible to view and even export all recorded locations.
.json or .kml format.If you want to deeply extract history from an iPhone backup:
If you want to start recording your GPS history:
.GPX, .KML or .CSV.To retrieve a GPX, CSV or KML file containing your GPS coordinates from your iPhone, here are the 3 best methods, depending on your past history or future tracking:
✅ OPTION 1 – Google Maps history → KML/GPX/CSV export
(If you had Google Location History enabled)
Steps: Activate or check history: Go to the Google Maps app > Profile > Your timeline > Settings. Make sure “Location History” is enabled. Access your history: Go to your computer: https://www.google.com/maps/timeline Export via Google Takeout: Go to https://takeout.google.com/ Selects “Location History” only. Choose the .KML (Google Earth compatible) or JSON format. Once the file is received, you can: Convert .kml → .gpx on https://gpx.studio/ Convert .json → .csv via tools like https://json-csv.com/ ✅ Advantage: very complete, based on continuous localization. ⚠️ Disadvantage: only works if previously activated with Google Maps.
✅ OPTION 2 – GPS log app for iPhone (native GPX/CSV)
If you want to start recording your trips now and exporting them:
Best free or freemium apps: App Format export Function Geofency CSV Automatic input/output log MyTracks GPX, KML Continuous GPS tracking, easy export Strava GPX Sports activities, GPS tracking Gaia GPS GPX, KML Outdoors (hiking, cycling) Polarsteps CSV, KML Automatic travel diary EasyTrails GPS GPX, KML, CSV Hiking, cycling, car Example with MyTracks (free): Install MyTracks Start recording when you move. At the end of the day, export your track to GPX/KML/CSV. You can open it in Google Maps, QGIS, GPX Studio, etc. ✅ OPTION 3 – Custom Siri shortcut to record continuously
You can create an iOS shortcut that saves your location to a .CSV file (latitude, longitude, date, time).
Basic example: Opens the Shortcuts app. Create a shortcut: Action 1: Get current position Action 2: Get the date Action 3: Add line to text file (CSV) in iCloud Drive Format: Date, Time, Latitude, Longitude 📩 If you want, I can generate a .shortcut file for you ready to import.
Here are several methods to view your GPS history (iPhone) on an interactive map, depending on the source (Google, iOS application or .gpx/.kml/.csv file):
✅ 1. Google Maps History → Automatic interactive map
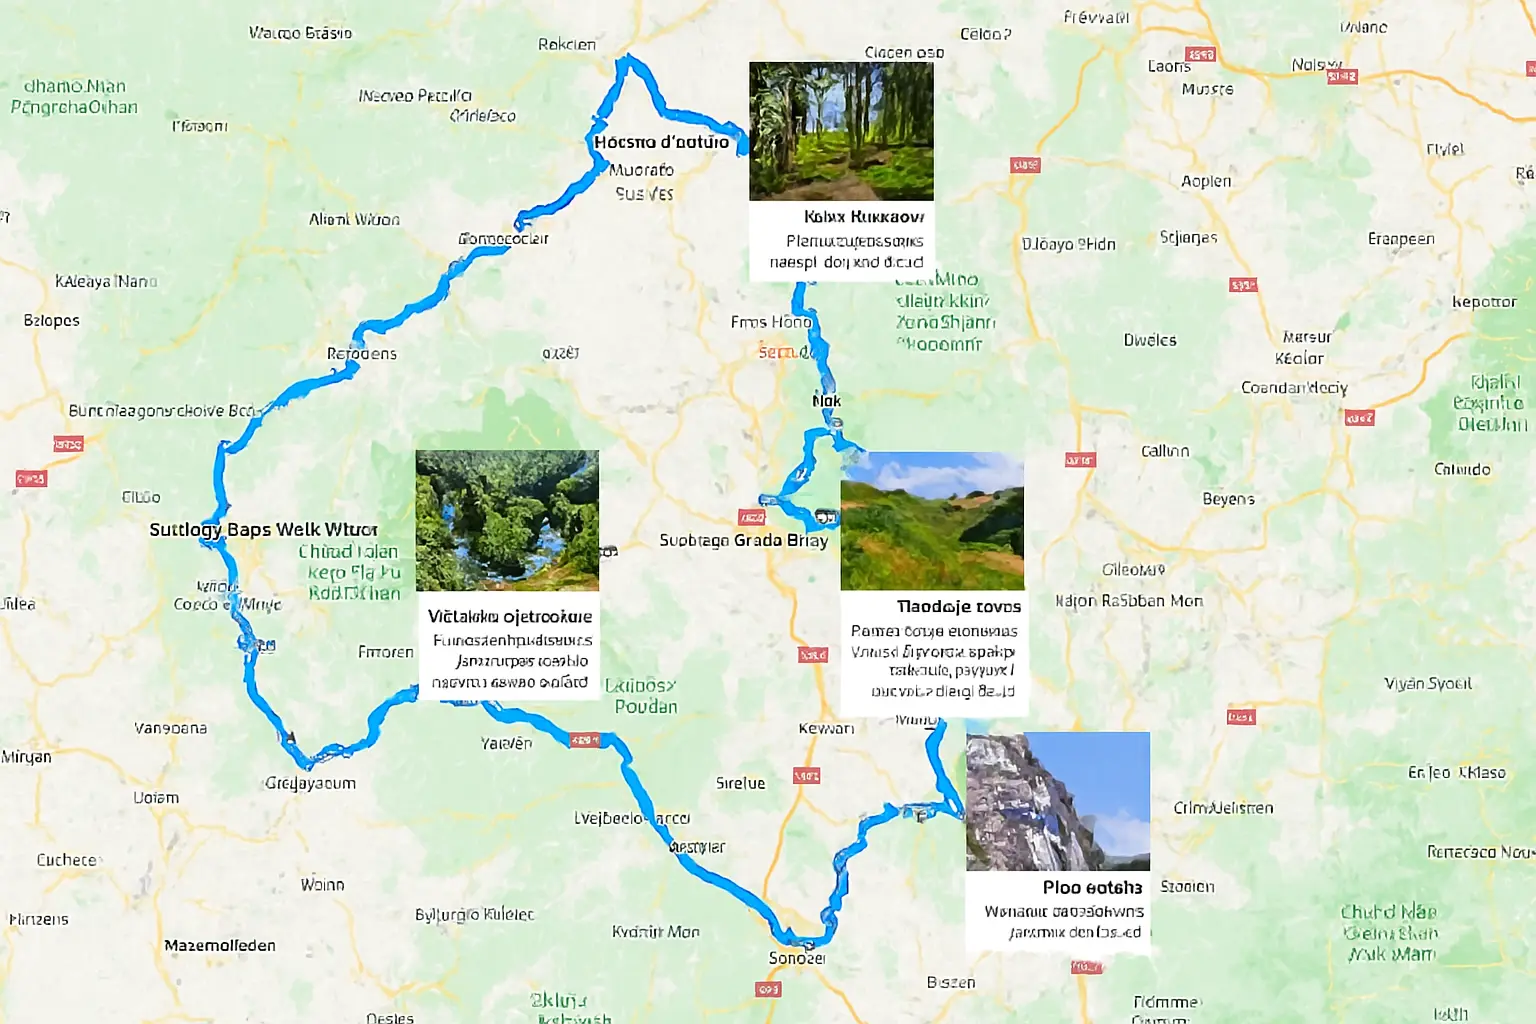
🔹 If you have Google Location History enabled: It even works from your iPhone, if Google Maps was installed and permissions given. 🔁 Steps: Go to 👉 https://www.google.com/maps/timeline Log in to your Google account. Use the calendar to select a day. An interactive map is displayed with: Your route (blue line) Places visited (points) Transit times Length of time spent at each location 📍 No export required, it’s automatic and interactive.
✅ 2. GPX/KML/CSV file → Online viewing (manual)
If you have a GPX, KML or CSV file (exported from Google Takeout, Strava, MyTracks, etc.), you can view it on several free interactive maps:
🌍 GPX Studio – powerful and simple Go to: https://gpx.studio Click on “Import” Load your .gpx, .kml, or .geojson file View your journey on the interactive map Option: edit, cut, analyze, export again 🗺️ Google My Maps – create a map with your route Go to: https://www.google.com/mymaps Click Create Map Click on Import > Add your .gpx or .kml Your route is displayed, with stages and point names You can personalize it, add notes, share it 🧭 Other platforms: Platform Formats Special feature WTracks GPX, KML, CSV Minimalist interface GPXSee GPX (PC/Mac software) Offline Analysis Ride with GPS GPX, TCX Special bike/hike ✅ 3. View your personalized CSV (if you have a home GPS log)
If you have a .csv file with Latitude, Longitude, Date columns, you can create a map with:
📍 Google Sheets + Google Maps Open Google Sheets and paste your data (lat/lon) Use the Mapping Sheets add-on or a script to create an interactive map Or converted to .kml with a tool like: https://csv2kml.com https://mapstogpx.com
Subscribe for travel planning updates.